How to Write AI Video Lighting Prompts: A Warm and Cool Light A/B Test
Learn how to write AI video lighting prompts with key light, rim light, color temperature, subject priority, background exposure, and continuity.
阅读约 8 分钟
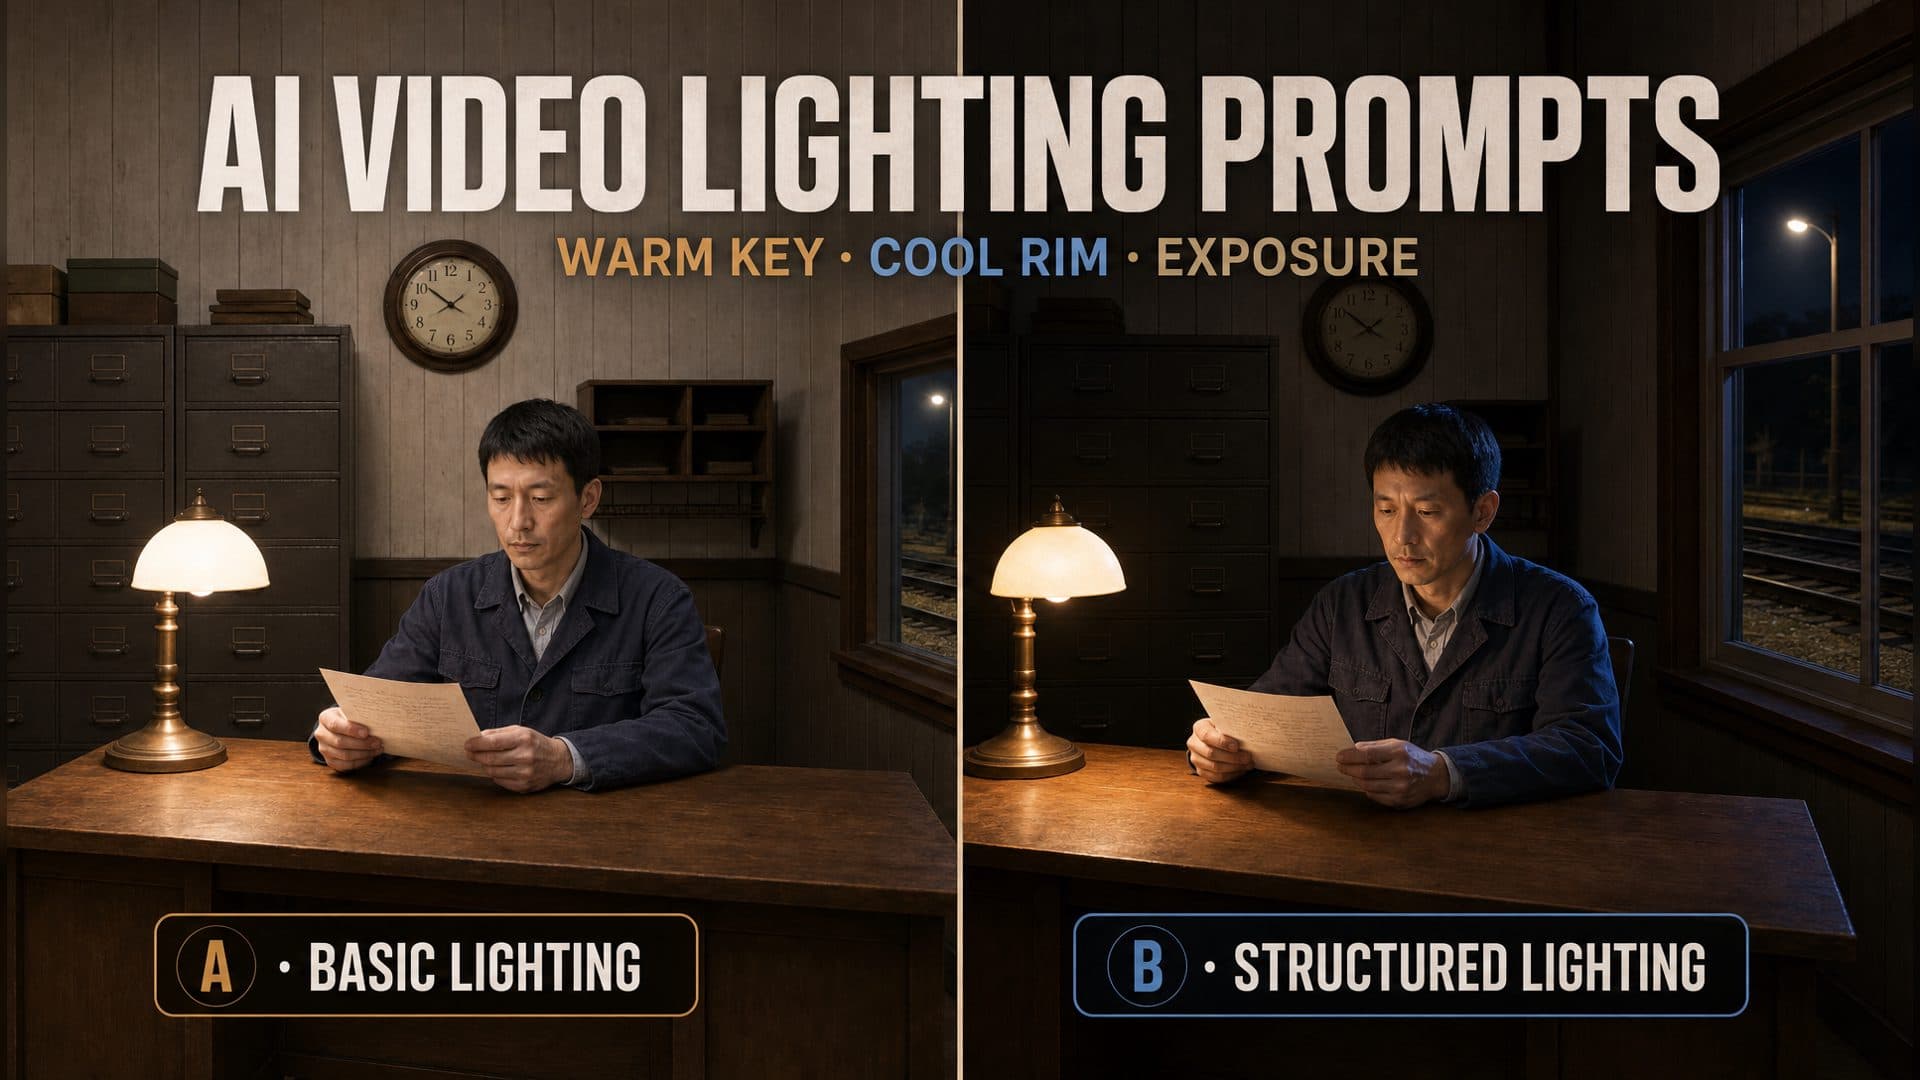
Use one character reference and one empty environment reference to create an eight-second scene with a believable practical light, a readable subject, and stable exposure. This A/B test shows how to write AI video lighting prompts by comparing two versions of a railroad clerk reading a letter at night. The control asks for natural illumination from a desk lamp and window. The technique version assigns each source a specific job.
Both videos use the same character, depot office, Seedance 2.0 Fast model, seed 103103, eight-second duration, 16:9 frame, 720p output, and generated location sound. The camera remains locked while the clerk lifts the paper, reads it, lowers his gaze, and brings the page down.
The lighting language is the variable. In the technique prompt, the frosted desk lamp is a soft 2700K key from frame left. It prioritizes the clerk's left cheek, eyes, hands, and paper. The dark window supplies a faint 6500K rim on his right shoulder and the back of his head. The background stays about one stop darker, with enough detail left in the filing cabinets and wall.
What the four-second frames show
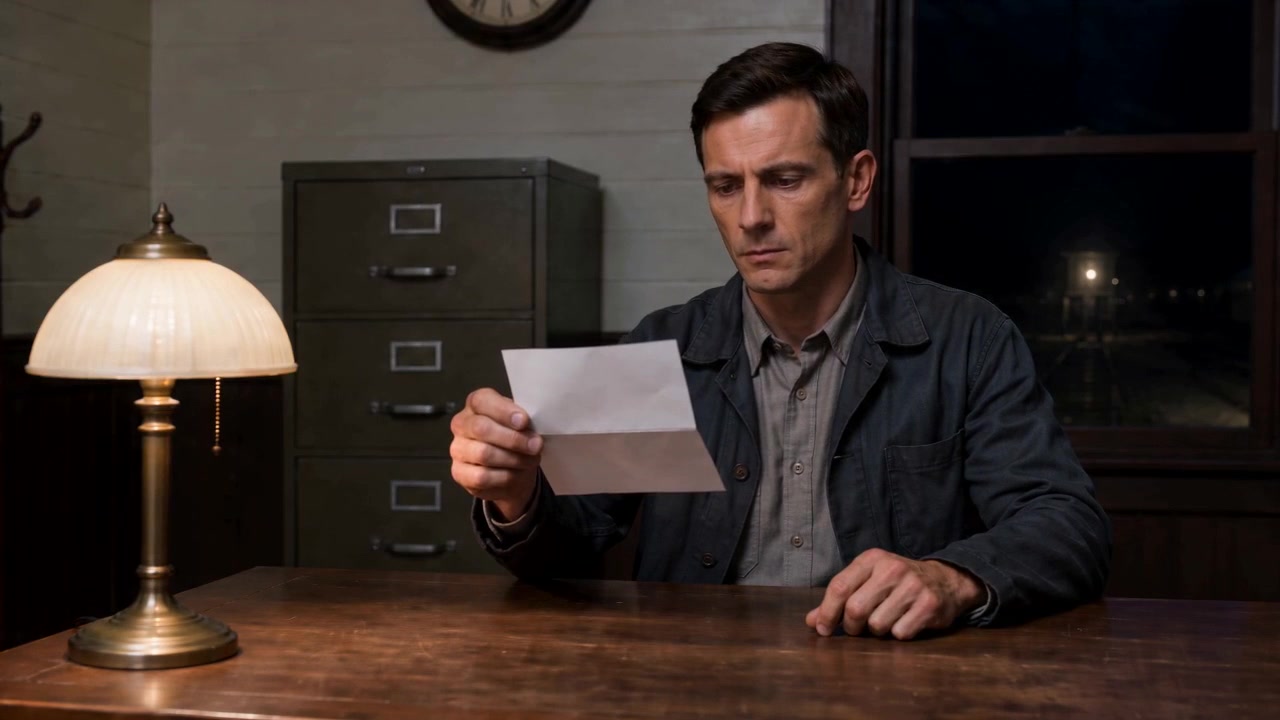
The control frame is clear and balanced. The lamp, wall, cabinet, desk, face, and paper all remain easy to see. Their brightness levels are fairly close, so attention can move between the man and the room.
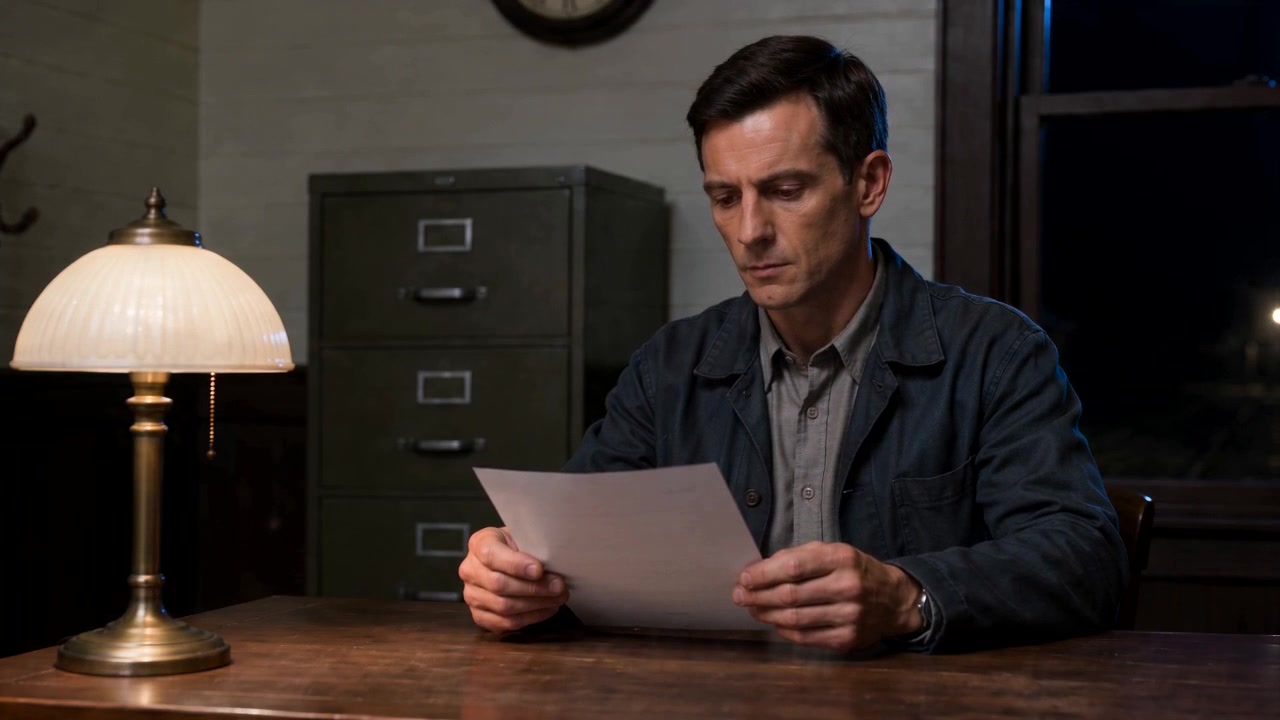
The technique frame separates those layers. Warm light from the lamp side lands on the face and hands, while a thin cool edge appears along the window side of his hair and shoulder. The filing cabinet and wall recede. His face and the paper become the first read without losing the room around him.
The compositions are close enough to make the lighting difference useful, though the hand and paper positions are not identical. One pair of frames shows what happened in this run. It does not establish how every seed or scene will respond.
Words such as cinematic, atmospheric, or dramatic describe an impression. They do not tell the model which source should dominate, where it sits, what it illuminates, or how the background should compare with the subject.
A useful lighting instruction answers practical questions. Which visible object creates the key? Where is it relative to the character? Which facial feature, hand, or prop needs attention? What job belongs to the secondary light? How dark should the background be? And which lighting conditions must remain stable while the person moves?
Answering those questions turns a mood into a design you can inspect on screen.
The seven parts of an AI video lighting prompt
Start with a source that belongs in the scene
Desk lamps, windows, candles, streetlights, signs, screens, and fireplaces give the light a physical origin. Choose a source already visible in the environment reference.
The frosted desk lamp on frame left provides the main illumination.
This line gives the highlights and shadows a spatial reason to exist.
Give each source one role
Choose one dominant light. Use the second source as restrained fill, ambient light, or rim light.
The desk lamp is the warm key light.
The night window adds a faint cool rim along the right shoulder and back of the head.
Keep the rim weaker than the key.
The hierarchy matters more than the number of sources. Two lights with clear responsibilities are easier to judge than a list of decorative colors.
Name direction and landing points
Direction alone is incomplete. State where the light lands.
Soft warm light travels from frame left and illuminates the left cheek,
eyes, hands, and paper.
Choose landing points that carry the scene. In a shot about reading a difficult letter, the eyes, hands, and page matter more than an empty corner.
Pair color temperature with plain language
Kelvin values suggest a range. Ordinary color words explain the relationship.
A soft warm 2700K desk-lamp key.
A faint cool 6500K window rim.
The numbers are most useful when the prompt also states which source is dominant and how strong the supporting light should feel.
Set the subject-to-background relationship
Relative exposure tells the model where the viewer should look.
Keep the background about one stop darker than the clerk.
Retain restrained detail in the filing cabinets and wall corners.
The room remains visible, but it no longer competes with the face, hands, and paper.
Describe the shadows
Shadow edges and contrast carry tone. Soft transitions suit the contained performance in this test. A harder source would create a different emotional reading.
Keep the lamp shadows soft and the facial transition natural.
Preserve skin, fabric, and paper detail in the dark areas.
Connect the shadow choice to the scene instead of adding a generic “premium” lighting label.
Protect continuity over time
Video lighting has to survive motion. Name the variables that should hold from beginning to end.
Keep source position, color temperature, shadow direction, and exposure stable
for all eight seconds. Maintain readable facial brightness as the paper moves.
This gives the opening, middle, and ending the same acceptance standard.
A reusable AI video lighting prompt
Create one continuous [duration] shot in which [character]
performs [main action] inside [environment].

Use practical sources already present in the scene.
[Visible source] is the key light at [position].
It produces [warm or cool], [soft or hard] light from [direction]
and prioritizes [face, eyes, hands, prop, or story subject].

[Secondary source] provides a restrained [rim, ambient light, or weak fill].
Keep it weaker than the key.

Keep the background [relative brightness] compared with the subject.
Retain readable shadow detail in [specific areas].
Use [shadow edge] and [contrast range] to support [scene emotion].

Throughout the shot, keep source positions, color temperatures,
shadow direction, and exposure consistent.
Keep the face and key story object readable during movement.
Fill it in from story priority to physical source, then add hierarchy, landing points, background exposure, shadow behavior, and continuity. That order prevents color terminology from taking over the actual purpose of the shot.
How to run a cleaner lighting comparison
Use the same character reference, environment, model, seed, duration, framing, action, and audio settings on both sides. Keep the control short: name the practical sources and ask for clear natural illumination.
In the technique version, add the key source and position, the secondary-light role, landing points, warm-to-cool relationship, subject priority, background exposure, shadow edges, and temporal continuity.
Compare the same moment in both videos. Check where the key appears to come from, which object attracts attention first, whether the secondary light competes with it, whether the background stays subordinate, and whether exposure changes as the character moves. For stronger evidence, repeat the comparison with another seed after the first pair is documented.
Where this lighting structure helps
A narrative filmmaker can use it to keep a face readable during a quiet interior performance. A product creator can assign a practical key to the hands and product while allowing the room to fall back. A short-form creator can use a colored sign or screen as the motivated source for a night scene. The same structure works whenever the lighting needs a visible hierarchy.
Frequently asked questions
Do AI video lighting prompts need Kelvin values?
Kelvin values help define a warm and cool relationship. Pair them with plain descriptions, source positions, and strength hierarchy so the intended result remains clear.
How many light sources should I describe?
Start with one key and one supporting source. Give each a separate job. Add another light only when the scene has a visible reason for it.
How do I keep the background from competing with the character?
State a relative brightness, such as one stop darker, and name the background areas that should retain restrained detail.
What should stay consistent during the video?
Track source position, color temperature, shadow direction, facial brightness, and overall exposure at the opening, middle, and ending.
Use the AVT-003 lighting workflow to test the same lighting structure with your own character, setting, and practical sources.